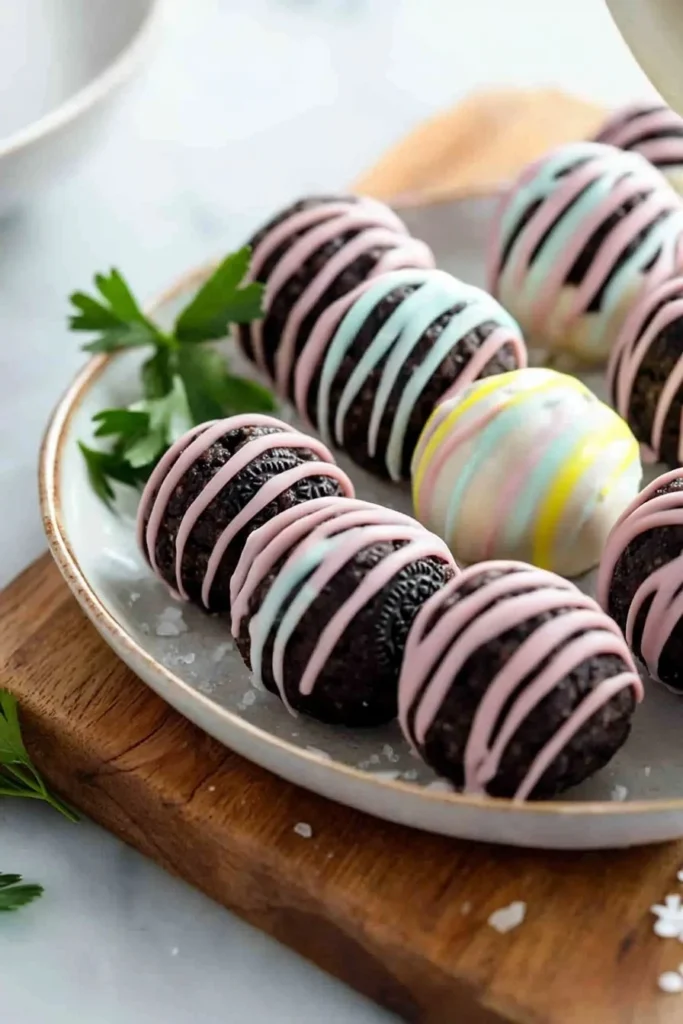
If you’re looking for a dessert that’s not just delicious but also incredibly easy to prepare, look no further than Oreo Cookie Balls. These delightful treats are a harmonious blend of crunchy Oreo cookies and smooth cream cheese, coated in chocolate for that perfect sweet finish. Picture this: as you bite into one of these cookie balls, you experience a satisfying crunch followed by a rich, creamy center that melts in your mouth. It’s a delight that both kids and adults will love!
Here’s a fun fact: did you know that Oreo cookies have been around since the early 1900s? Their versatility is endless, making them an ideal candidate for creative desserts. This simplicity is what sets Oreo Cookie Balls apart from more complex recipes, like soufflés or baked cheesecakes, which require more time and skill in the kitchen. They’re the perfect addition to family gatherings or winter evenings spent with loved ones, ready to impress without the hassle.
So, roll up your sleeves, and let’s dive into this delectable recipe!
What is Oreo Cookie Balls?
Now, you might be wondering—how did we come up with the name Oreo Cookie Balls? I mean, it’s not like they’re shaped like traditional balls or that they bounce around like one! Instead, they’re beautifully round bites of joy made primarily from crushed Oreos and cream cheese. The way to a man’s heart is indeed through his stomach, and these treats have won many hearts at gatherings and potlucks. I still remember the first time I brought them to a family gathering; my uncle kept sneaking back for “just one more.”
So gather your loved ones, because once you try making Oreo Cookie Balls, you’ll want to showcase your new favorite dessert to the world.
Why You’ll Love This Oreo Cookie Balls
Oreo Cookie Balls are not just about flavor; they’re also incredibly satisfying as a main dessert option. Unlike traditional baked goods that can be time-consuming, these beauties require minimal effort, making them a fantastic cost-saving option for those who prefer to cook at home. Plus, we all know how much fun it is to get creative with toppings!
Whether you choose a rich dark chocolate coating or a classic white chocolate drizzle, the possibilities are endless. The crunchy exterior paired with the creamy interior makes these a true crowd-pleaser, reminiscent of other no-bake treats like chocolate truffles. But with the added crunch of Oreos, they deliver a unique flair.
Why not grab your Oreo cookies and join the fun?
How to Make Oreo Cookie Balls
Quick Overview
Oreo Cookie Balls are one of those recipes that make you feel like an accomplished baker without all the fuss. The wonderful contrast of the crunchy exterior and the soft, sweet filling will have you hooked from the first bite. Plus, you can whip them up in just about 30 minutes (plus chilling time!), making them a quick and satisfying treat.
Ingredients
- 1 package Oreo cookies (approx. 36 cookies)
- 8 oz cream cheese, softened
- Chocolate or white chocolate for coating (about 12 oz)
Step-by-Step Instructions
- Prepare the Oreos: Start by crushing the Oreo cookies into fine crumbs. You can do this using a food processor or by placing the cookies in a sealed plastic bag and smashing them with a rolling pin.
- Mix the Filling: In a large bowl, combine the crushed Oreo cookies with the softened cream cheese. Mix until everything is well combined and you have a thick, malleable dough-like mixture.
- Shape the Balls: Scoop out about a tablespoon of the mixture and roll it into a ball between your palms. Place each ball on a lined baking sheet. Repeat until all the mixture is used up.
- Chill: Place the baking sheet in the refrigerator for about 30 minutes to allow the cookie balls to firm up.
- Coat: Melt your chocolate coating in a microwave-safe bowl in 30-second intervals, stirring between each session until smooth. Dip each cooled cookie ball into the melted chocolate, making sure to cover it completely. Place the coated balls back on the baking sheet.
- Set: Allow the chocolate to set at room temperature or refrigerate for a quicker firming.
- Serve: Once the coating has hardened, your Oreo Cookie Balls are ready to be enjoyed!
Top Tips for Perfecting Oreo Cookie Balls
- Substitutions: If you’d like to switch it up, consider using flavored cream cheese, such as vanilla, or even a Halal-friendly chocolate spread for extra flavor.
- Timing: Make sure to leave enough time for your Oreo Cookie Balls to chill properly in the refrigerator. They hold their shape better when Firm.
- Avoiding Mistakes: Be careful not to overheat your chocolate when melting, as it can scorch. Stir continuously for a smooth coating.
Storing and Reheating Tips
Oreo Cookie Balls have a decent shelf life when stored properly. Keep them in an airtight container in the refrigerator for up to one week or in the freezer for up to three months. If you choose to freeze them, let them thaw in the fridge before serving to maintain their texture.
If you’re looking for the perfect treat to enjoy during cozy dinner parties or just as a fun project with the kids, these Oreo Cookie Balls are an absolute must-try. So gather those ingredients and get ready to indulge in a little bit of chocolaty heaven!

Now that you’ve got all the tips and tricks, are you ready to make your own Oreo Cookie Balls? Dive into this delightful recipe and bring smiles to everyone’s faces!
Oreo Cookie Balls
Ingredients
Method
- Crush the Oreo cookies into fine crumbs using a food processor or a rolling pin in a sealed plastic bag.
- In a large bowl, combine the crushed Oreo cookies with the softened cream cheese. Mix until well combined and dough-like.
- Scoop out about a tablespoon of the mixture and roll it into a ball. Place each ball on a lined baking sheet.
- Refrigerate the baking sheet for about 30 minutes to allow the cookie balls to firm up.
- Melt the chocolate coating in a microwave-safe bowl, stirring in 30-second intervals until smooth.
- Dip each cooled cookie ball into the melted chocolate until completely covered and return to the baking sheet.
- Allow the chocolate to set at room temperature or refrigerate for quicker firming.
- Once the coating has hardened, the Oreo Cookie Balls are ready to be enjoyed!
Notes

I am Mark Luke and I’m the founder of PrinterBio.com. I started this site because I was tired of dealing with the problems that come with using printers. I wanted to help others avoid the time and frustration I had, So I started this site based on my own experience & what I’ve learned from other professionals. My goal is to help you find the right printer and easily solve any problems you may have with your printer.