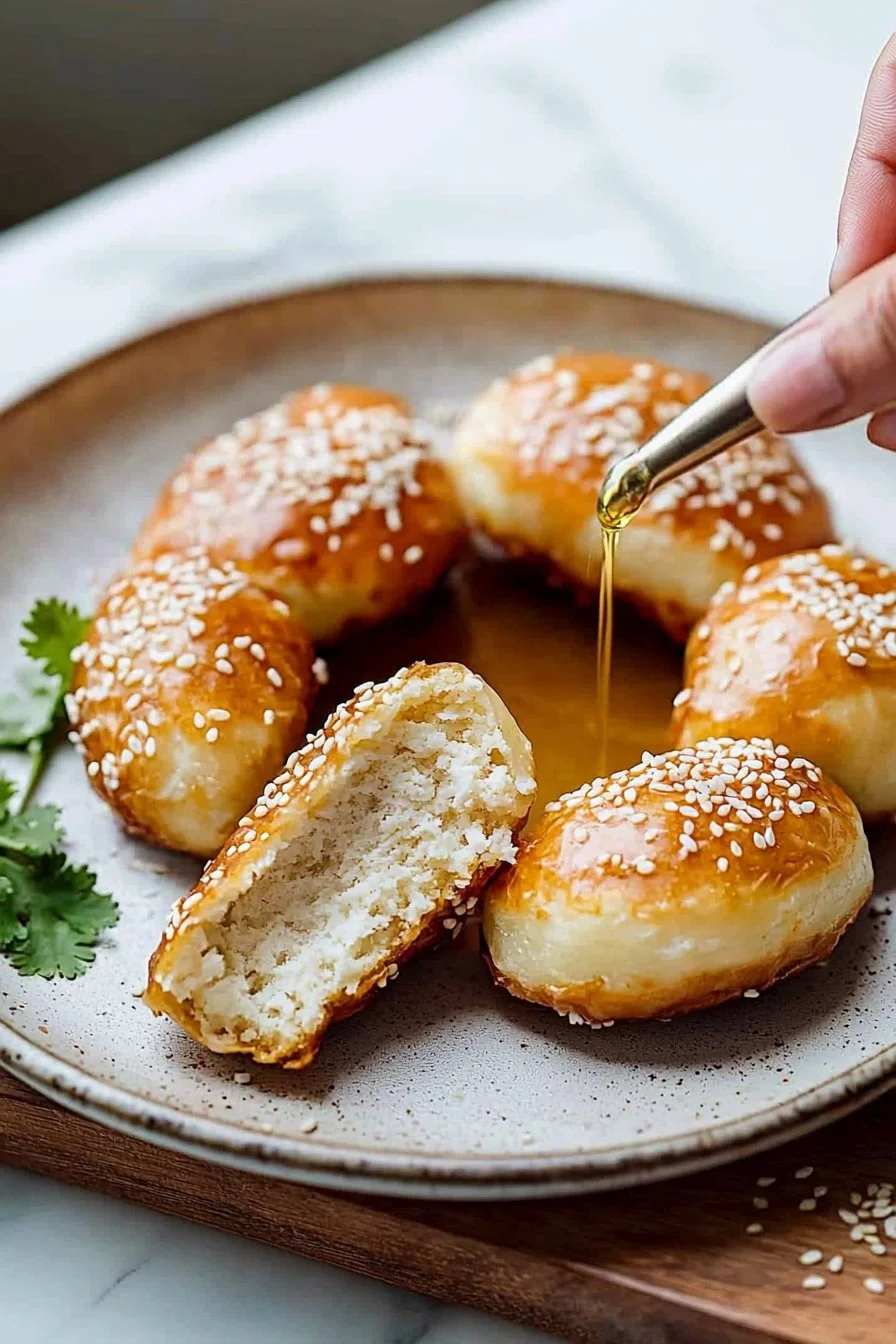
There’s something incredibly satisfying about biting into a warm, crispy Vietnamese donut, also known as “Bánh Tiêu.” The shell is perfectly golden, while the inside boasts a light, airy texture that makes each bite a delight. Interestingly, these donuts are often filled with sweet mung bean paste or enjoyed plain, making them versatile enough for any occasion. Legend has it that when the first batch of these donuts landed in Vietnam, they became a hit at family gatherings, prompting cooks to perfect their recipes.
If you appreciate simple, delicious recipes that bring the family together, you’ll love making these donuts at home. They can be compared to a classic American donut, but with a unique twist that makes them stand out. Plus, they’re easy enough to whip up on a leisurely weekend morning or during cozy winter evenings. Let’s dive into the world of Vietnamese donuts and discover why they’re such a cherished treat!
What are Vietnamese Donuts?
Now, you might be wondering, “What’s in a name?” Seriously, why are they called donuts if they’re not like your classic round confections? Well, it’s all about the texture, folks! These semi-sweet treats have a shape and vibe that’s undeniably donut-like, yet they bring in the flair of Vietnamese flavors. They hold a special place in my heart because, as they say, ‘the way to a man’s heart is through his stomach.’ I remember trying these at a bustling market, and I couldn’t help but grab an extra bag to share with family!
Want to impress your loved ones? You totally can! These Vietnamese donuts will make you the star of every family gathering. So, are you ready to bring a little culinary magic into your kitchen?
Why You’ll Love These Vietnamese Donuts
Vietnamese donuts are the perfect blend of crispy on the outside and airy on the inside, making them irresistible. What’s even better? Preparing this dish at home is budget-friendly! You can whip up a sizeable batch for a family gathering without breaking the bank. Plus, these donuts are super versatile; you can enjoy them plain or get creative with toppings.
Think of them as a sister to traditional doughnuts, but with a light finesse and a slight chewiness that makes them utterly satisfying. Add some sweet or savory toppings for an extra flavor kick! So, grab those apron strings, and let’s get started on this delightful journey of making Vietnamese donuts at home.
How to Make Vietnamese Donuts
Quick Overview
Making Vietnamese donuts is not only easy but also gratifying! The texture is crispy on the outside, with a soft, pillowy interior that practically melts in your mouth. You can create these delectable treats in under an hour. Yes, you heard that right! With just a few simple steps, you’ll be on your way to enjoying homemade Vietnamese donuts.
Preparation Time: 15 minutes
Cooking Time: 30 minutes
Ingredients for Vietnamese Donuts
To make these delicious treats, you’ll need the following ingredients:
- 2 cups all-purpose flour
- 1/2 cup rice flour
- 1/4 cup sugar
- 1/2 teaspoon salt
- 1 tablespoon baking powder
- 1 cup warm water
- 1/2 teaspoon sesame seeds (for topping)
- Oil for frying
Step-by-Step Instructions
- Prepare the Dry Ingredients: In a large mixing bowl, combine the all-purpose flour, rice flour, sugar, salt, and baking powder. Mix well to ensure all the ingredients are evenly distributed.
- Add the Wet Ingredients: Gradually pour the warm water into the dry mixture. Stir everything together until you have a smooth, cohesive dough. If the dough feels too sticky, sprinkle a little more all-purpose flour.
- Knead the Dough: Lightly flour your workspace, and knead the dough for about 5 minutes until it’s smooth and elastic.
- Shape the Donuts: Divide the dough into small balls, approximately the size of a golf ball. Flatten each ball slightly with your palm to shape it into a disc.
- Let the Dough Rest: Allow the discs to rest on a floured surface for about 15 minutes. This will help them rise a bit during frying.
- Heat the Oil: In a large, deep skillet, heat enough oil for frying over medium heat. You can test the oil by dropping a small piece of dough into it; if it bubbles and rises, it’s ready!
- Fry the Donuts: Carefully place a few discs into the hot oil, frying until they turn golden brown, usually about 3-4 minutes on each side. Make sure not to overcrowd the pan.
- Drain and Top: Once golden brown, remove the fried donuts with a slotted spoon and drain them on paper towels. While still warm, sprinkle sesame seeds on top for that extra crunch!
- Serve and Enjoy: Let them cool slightly, and enjoy your Vietnamese donuts fresh out of the fryer!
Top Tips for Perfecting Vietnamese Donuts
- Flour Substitutions: If you want to experiment, you can blend in a bit of whole wheat flour for added flavor, but ensure it doesn’t overpower the delicate taste of the donuts.
- Frying Safely: Ensure the oil is hot enough before frying; otherwise, they’ll absorb too much oil and turn greasy. A good rule of thumb is to keep the temperature around 350°F (175°C).
- Avoiding Common Mistakes: Dough that’s too sticky can make frying difficult, so always add flour as needed until it becomes manageable.
Storing and Reheating Tips
These Vietnamese donuts are best enjoyed fresh, but you can certainly store them for later enjoyment!
- Refrigeration: Keep leftover donuts in an airtight container in the refrigerator, where they will stay fresh for up to 3 days.
- Freezing: For longer storage, place them in a freezer-safe bag or container for up to 2 months.
- Reheating: To preserve texture, reheat them in the oven or air fryer at a low temperature until they’re crispy again, rather than using a microwave, which can make them soggy.
Now that you’ve got everything covered, it’s time to dive into the delightful world of Vietnamese donuts! Bring the family together, share stories, and indulge in these crispy treats that are sure to please everyone at the table.
FAQs About Vietnamese Donuts
Q: Can I fill Vietnamese donuts with something other than mung bean?
A: Absolutely! You can experiment with different fillings such as sweet red bean paste, custard, or even cream cheese for a delicious twist.
Q: Can I make these donuts vegan?
A: Yes! You can substitute warm water for plant-based milk, and the recipe remains completely vegan.
Q: What do I serve with Vietnamese donuts?
A: They pair wonderfully with a cup of coffee or tea, but feel free to enjoy them just on their own!
Don’t miss out on this delightful treat—try making Vietnamese donuts today for a tasty experience that everyone will love!

Vietnamese Donuts (Bánh Tiêu)
Ingredients
Method
- In a large mixing bowl, combine the all-purpose flour, rice flour, sugar, salt, and baking powder. Mix well to ensure all the ingredients are evenly distributed.
- Gradually pour the warm water into the dry mixture. Stir everything together until you have a smooth, cohesive dough. If the dough feels too sticky, sprinkle a little more all-purpose flour.
- Lightly flour your workspace, and knead the dough for about 5 minutes until it's smooth and elastic.
- Divide the dough into small balls, approximately the size of a golf ball. Flatten each ball slightly with your palm to shape it into a disc.
- Allow the discs to rest on a floured surface for about 15 minutes. This will help them rise a bit during frying.
- In a large, deep skillet, heat enough oil for frying over medium heat. You can test the oil by dropping a small piece of dough into it; if it bubbles and rises, it's ready!
- Carefully place a few discs into the hot oil, frying until they turn golden brown, usually about 3-4 minutes on each side. Make sure not to overcrowd the pan.
- Once golden brown, remove the fried donuts with a slotted spoon and drain them on paper towels. While still warm, sprinkle sesame seeds on top for that extra crunch!
- Let them cool slightly, and enjoy your Vietnamese donuts fresh out of the fryer!
Notes

I am Mark Luke and I’m the founder of PrinterBio.com. I started this site because I was tired of dealing with the problems that come with using printers. I wanted to help others avoid the time and frustration I had, So I started this site based on my own experience & what I’ve learned from other professionals. My goal is to help you find the right printer and easily solve any problems you may have with your printer.