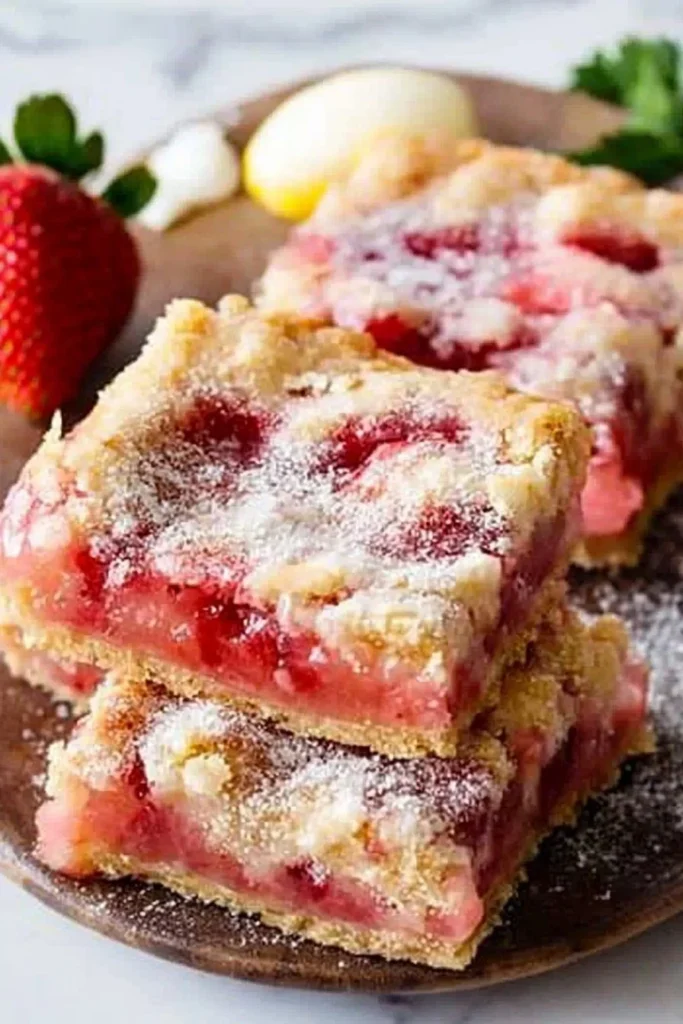
There’s something absolutely delightful about biting into a Strawberry Pie Bar. The first thing you notice is the crispiness of the buttery crust, followed by the sweet, juicy burst of strawberries that seems to dance on your taste buds. These bars are like a perfect marriage of fresh fruit and comfort, making them ideal for family gatherings or cozy winter evenings. I remember the first time I made these with my family; the kitchen was filled with laughter and the sweet aroma of strawberries, which instantly made my heart smile. If you’ve enjoyed my Lemon Bars or Blueberry Crumble, you’ll definitely want to try these Strawberry Pie Bars! They’re refreshingly simple, deliciously satisfying, and sure to impress anyone lucky enough to take a bite.
What is Strawberry Pie Bars?
So, why on Earth are we calling them “bar” instead of pie? Well, let’s be honest: sometimes, life happens, and a gal just doesn’t have the time or energy for making a traditional pie crust! Enter the Strawberry Pie Bar—a fun, portable, easy-to-eat version of your favorite dessert. The way to a man’s heart is through his stomach, right? Picture this: a sunny afternoon, friends gathered around, sharing stories and devouring these delicious bars. Trust me, once you serve them, you’ll witness everyone’s happy dance. So, why not whip up a batch today and see the smiles unfold?
Why You’ll Love This Strawberry Pie Bars
First, let’s talk about the star of the show: the juicy strawberry filling that brings a refreshing burst of flavor with every bite. You’ll get to experience a delightful contrast of textures: crispy crust, luscious fruit filling, and a hint of sweetness. Not only are they easy to make, but you also save money by cooking at home instead of splurging at the bakery. Now, just imagine different toppings you could add, like a sprinkle of coconut or a dollop of whipped cream, elevating your Strawberry Pie Bars to a whole new level! These bars are reminiscent of classic fruit tarts but require way less effort—making them the perfect dessert for your next gathering!
How to Make Strawberry Pie Bars
Quick Overview
Making Strawberry Pie Bars is easy and incredibly satisfying, whether you’re a budding chef or a seasoned pro. With only about 15 minutes of prep time, you’ll blend crispy crust with gooey strawberry goodness in no time. Within a short baking session, your kitchen will be filled with the mouthwatering aroma that makes everyone eager for dessert. Let’s dive right into the details so you can start baking!
Ingredients
- 2 cups fresh strawberries, sliced
- 1 cup granulated sugar
- 2 tablespoons cornstarch
- 1 tablespoon lemon juice
- 1 teaspoon vanilla extract
- 1 1/2 cups all-purpose flour
- 1/2 cup unsalted butter, softened
- 1/4 cup powdered sugar
- 1 egg
- 1/2 teaspoon salt
Step-by-Step Instructions
- Preheat the Oven: Begin by preheating your oven to 350°F (175°C). This step is crucial for ensuring your bars bake evenly.
- Prepare the Strawberry Filling: In a mixing bowl, combine the sliced strawberries, granulated sugar, cornstarch, lemon juice, and vanilla extract. Stir gently to coat the strawberries evenly, and set aside to macerate while you prepare the crust.
- Make the Crust: In another bowl, beat the softened butter and powdered sugar until creamy. Add the egg and mix well. In a separate bowl, whisk together the all-purpose flour and salt. Gradually add the flour mixture to the butter mixture, combining until a dough forms.
- Press the Dough: Grease a 9×9-inch baking dish and press about two-thirds of the dough into the bottom of the dish to form an even layer. Use the remaining dough to crumble on top of the strawberry filling.
- Add the Filling: Pour the strawberry mixture over the crust, then sprinkle the reserved dough over the top.
- Bake: Bake in the preheated oven for about 30-35 minutes, or until the top is golden brown and the filling is bubbling.
- Cool and Slice: Allow to cool in the dish for about 15 minutes before slicing into bars. Enjoy the sweetness!
Top Tips for Perfecting Strawberry Pie Bars
- Substitutions: Feel free to swap out strawberries for other berries if desired. Raspberries or blueberries can also provide a delightful twist!
- Timing: Don’t skip letting the bars cool before slicing to keep the shape intact.
- Avoid Common Mistakes: Make sure not to overmix the dough—this will keep your crust nice and tender.
Storing and Reheating Tips
For the best storage, keep your Strawberry Pie Bars in an airtight container in the refrigerator, and they will stay fresh for up to 5 days. If you want to store them for longer, they freeze beautifully! Simply wrap individual bars in plastic wrap and place them in a freezer-safe container, where they can last for up to three months. To reheat, simply thaw at room temperature or pop them in the microwave for 20-30 seconds for that fresh-out-of-the-oven feeling.
Now that you have all the details, are you ready to embark on this sweet adventure? Let’s get to baking and create some delicious memories with your loved ones!

Strawberry Pie Bars
Ingredients
Method
- Preheat your oven to 350°F (175°C).
- In a mixing bowl, combine the sliced strawberries, granulated sugar, cornstarch, lemon juice, and vanilla extract. Stir gently to coat the strawberries evenly, and set aside.
- In another bowl, beat the softened butter and powdered sugar until creamy. Add the egg and mix well.
- In a separate bowl, whisk together the all-purpose flour and salt. Gradually add the flour mixture to the butter mixture, combining until a dough forms.
- Grease a 9×9-inch baking dish and press about two-thirds of the dough into the bottom to form an even layer.
- Pour the strawberry mixture over the crust, then crumble the reserved dough on top.
- Bake in the preheated oven for about 30-35 minutes, or until the top is golden brown and the filling is bubbling.
- Allow to cool in the dish for about 15 minutes before slicing into bars.
Notes

I am Mark Luke and I’m the founder of PrinterBio.com. I started this site because I was tired of dealing with the problems that come with using printers. I wanted to help others avoid the time and frustration I had, So I started this site based on my own experience & what I’ve learned from other professionals. My goal is to help you find the right printer and easily solve any problems you may have with your printer.