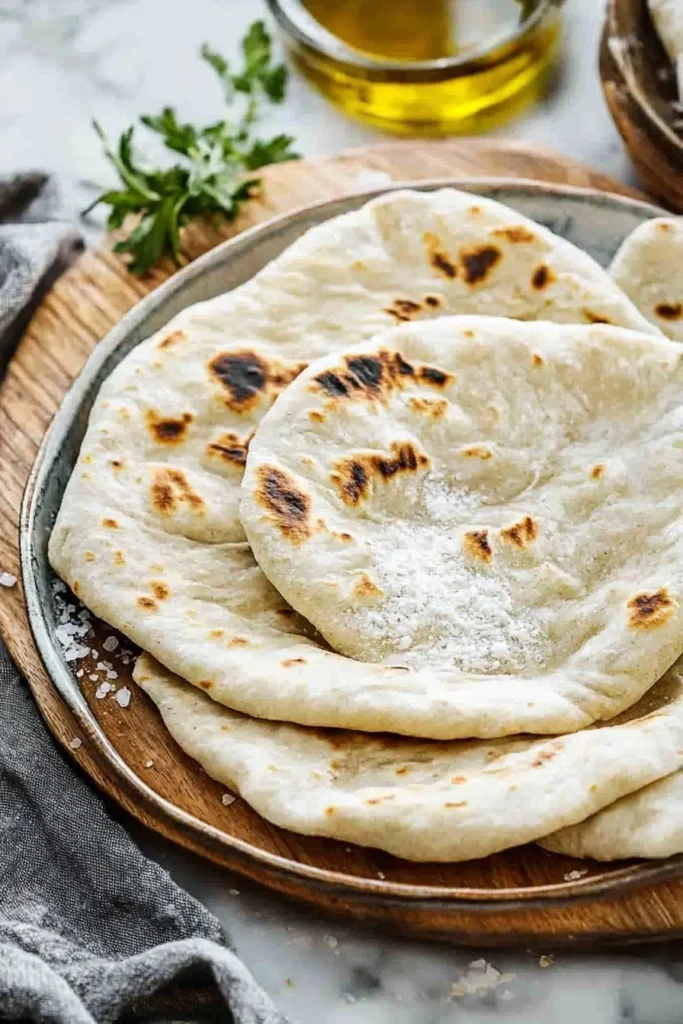
If you’ve ever sunk your teeth into a warm, fluffy pita bread, you know there’s something truly magical about it. Pita bread is the perfect companion for dips, wraps, or just as a standalone snack, and it’s surprisingly simple to make at home. Imagine tearing into a freshly baked pita, its crispy exterior giving way to a soft, airy pocket waiting for your favorite fillings. Best of all, making pita bread from scratch is an activity that can turn any ordinary family gathering into a fun culinary adventure!
Did you know that pita bread is enjoyed across various cultures? Much like my popular recipe for homemade naan, this versatile flatbread can elevate any meal, whether you’re dipping it in hummus or stuffing it with grilled veggies. So grab your flour, and let’s whip up a batch of Easy Homemade Pita Bread that will surely impress your family and friends!
What is Easy Homemade Pita Bread?
So, what exactly is pita bread? Is it the magical bread that appears in Middle Eastern dishes or just another flatbread? With its unique pocket that can transform into a wrap for any stuffing, pita bread has a delightful versatility. The name “pita” comes from the Greek word for “bread,” but don’t worry; you don’t need to be Greek to appreciate its charm. They do say, “The way to a man’s heart is through his stomach,” and with these fluffy pockets of joy, you’ll win over hearts and stomachs alike. Ready to impress everyone in the kitchen?
Why You’ll Love This Easy Homemade Pita Bread
There are countless reasons to fall in love with this Easy Homemade Pita Bread. First off, these pitas are the perfect addition to any main dish, whether you’re indulging in a savory falafel platter or a fresh salad. Secondly, making your own pita bread at home is incredibly cost-effective! Purchasing store-bought pitas can add up, especially for a large family gathering. Why spend more when you can create something delicious from scratch?
Let’s not forget about the endless possibilities for toppings. Think warm salmon, seasoned chicken, fresh veggies, or creamy tahini. Each bite is an explosion of flavor! Compared to other flatbreads, like tortillas, this pita possesses its own special texture and flair. So, why not gather the family and have fun making these delightful pockets together?
How to Make Easy Homemade Pita Bread
Quick Overview
Baking pita bread is not just easy but also incredibly satisfying! The moment you pull them from the oven and witness them puffing up like fluffy little balloons, you’ll be hooked. The warm aroma wafting through your kitchen is irresistible. In about 1 hour and 15 minutes—prep and cook included—you can have freshly baked pita to enjoy!
Ingredients
For this Easy Homemade Pita Bread, you’ll need the following ingredients:
- 2 cups all-purpose flour
- 1 teaspoon salt
- 1 teaspoon sugar
- 1 teaspoon instant yeast
- 3/4 cup warm water (about 110°F or 43°C)
- 1 tablespoon olive oil
Make sure all ingredients are room temperature and your yeast is fresh for the best results!
Step-by-Step Instructions
- Combine Dry Ingredients: In a large bowl, mix together the flour, salt, sugar, and instant yeast until evenly combined.
- Mix Wet Ingredients: In a separate bowl, combine the warm water and olive oil, then gradually add this mixture to your flour mix. Stir with a spatula until a shaggy dough starts to form.
- Knead the Dough: Transfer the dough to a work surface and knead for about 5-7 minutes until smooth and elastic. If the dough feels too sticky, sprinkle in a bit more flour as needed.
- First Rise: Place your kneaded dough in a lightly greased bowl, cover it with a kitchen towel, and let it rise in a warm place for about 30 minutes, or until doubled in size.
- Shape the Dough: After the first rise, punch down the dough and divide it into 8 equal pieces. Roll each piece into a ball and cover them with a towel to rest for about 10 minutes.
- Roll Out the Pitas: Preheat your oven to 475°F (245°C). On a lightly floured surface, roll each ball into a circle about 1/4 inch thick.
- Bake: Place the rounded dough on a baking sheet lined with parchment paper. Bake for about 5-7 minutes, or until they puff up and are lightly golden.
- Cool and Enjoy: Remove from the oven, and let cool wrapped in a kitchen towel to keep them soft.
Top Tips for Perfecting Easy Homemade Pita Bread
- Use Fresh Ingredients: Ensure your yeast is fresh—if it’s expired, your dough may not rise properly.
- Kneading Is Key: Don’t rush the kneading process! Knead until the dough is smooth and elastic for the best texture.
- Resting Time: Allow the dough to rest; this helps with gluten development, leading to softer pockets.
- Experiment with Flavors: Feel free to add herbs like oregano or garlic powder to your dough for an extra flavor punch.
Storing and Reheating Tips
If you have any leftover pita bread (which is often rare!), here’s how to store it. Pita bread can be refrigerated for up to 4-5 days in an airtight bag. Alternatively, you can freeze them! Just stack them with parchment paper in between, store them in a freezer-safe bag, and they can last up to a month.
To reheat, wrap the pitas in a damp paper towel and microwave for about 20-30 seconds. For oven reheating, place them in a preheated oven at 350°F (175°C) for about 5-10 minutes, or until warm.

Now that you have the complete guide to make your own Easy Homemade Pita Bread, aren’t you excited to start baking? Whether you’re enjoying them fresh from the oven or using them to create delicious wraps, this recipe is guaranteed to make you smile! Happy baking!
Easy Homemade Pita Bread
Ingredients
Method
- In a large bowl, mix together the flour, salt, sugar, and instant yeast until evenly combined.
- In a separate bowl, combine the warm water and olive oil, then gradually add this mixture to your flour mix. Stir with a spatula until a shaggy dough starts to form.
- Transfer the dough to a work surface and knead for about 5-7 minutes until smooth and elastic. If the dough feels too sticky, sprinkle in a bit more flour as needed.
- Place your kneaded dough in a lightly greased bowl, cover it with a kitchen towel, and let it rise in a warm place for about 30 minutes, or until doubled in size.
- After the first rise, punch down the dough and divide it into 8 equal pieces. Roll each piece into a ball and cover them with a towel to rest for about 10 minutes.
- Preheat your oven to 475°F (245°C). On a lightly floured surface, roll each ball into a circle about 1/4 inch thick.
- Place the rounded dough on a baking sheet lined with parchment paper. Bake for about 5-7 minutes, or until they puff up and are lightly golden.
- Remove from the oven, and let cool wrapped in a kitchen towel to keep them soft.
Notes

I am Mark Luke and I’m the founder of PrinterBio.com. I started this site because I was tired of dealing with the problems that come with using printers. I wanted to help others avoid the time and frustration I had, So I started this site based on my own experience & what I’ve learned from other professionals. My goal is to help you find the right printer and easily solve any problems you may have with your printer.