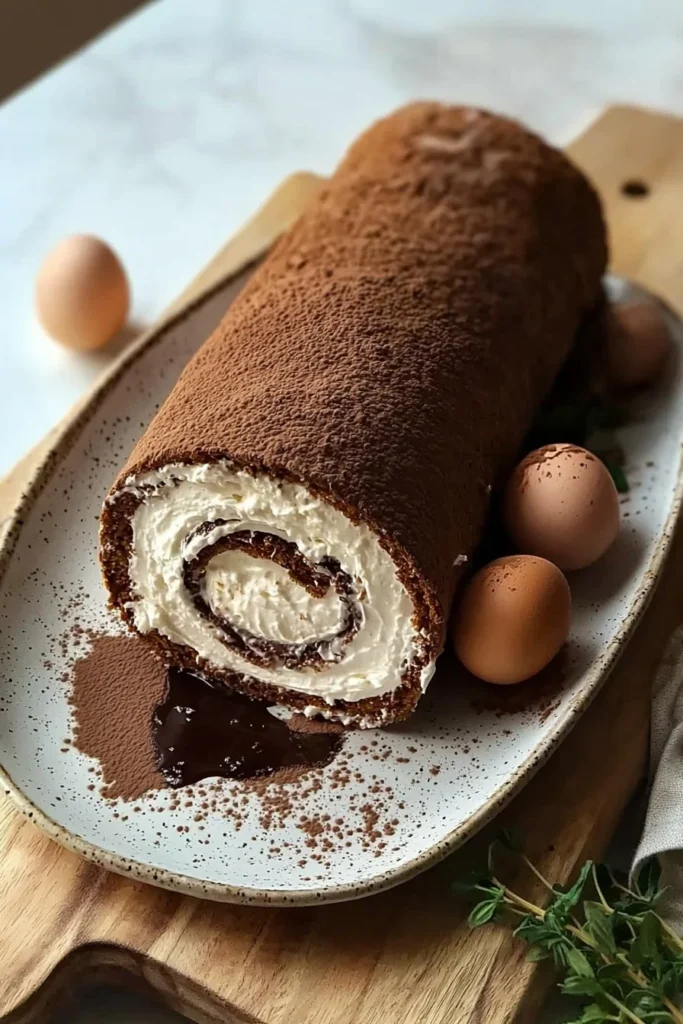
Imagine sinking your teeth into a light, fluffy dessert that is perfectly rolled up, revealing a tantalizing layer of creamy whipped goodness, all while being infused with the rich aroma of freshly brewed coffee. Yes, that’s the magic of a Coffee Swiss Roll! This delectable dessert not only delivers on flavor but also boasts an elegant appearance, making it a showstopper at family gatherings.
Did you know that Swiss rolls have a fascinating history that dates back to the 19th century? It’s a fun little tidbit to share at the dinner table while enjoying this delightful dessert. What makes this Coffee Swiss Roll special is its simplicity and the way it brings everyone together, much like my popular Chocolate Chip Cookies recipe that has become a household favorite.
Whether you’re looking to impress guests or simply treat yourself, this recipe is bound to become a staple in your family’s culinary repertoire. Let’s dive into the world of Coffee Swiss Roll where deliciousness awaits!

What is Coffee Swiss Roll?
Coffee Swiss Roll: the name itself sounds like an elegant dessert from a fancy café, doesn’t it? But, believe it or not, there’s probably a backstory involving a very clever baker who said, “Why not roll this cake up?” Imagine them tossing flour around with joy, thinking, “The way to a man’s heart is through his stomach!” And that’s how this delightful treat was born!
This Coffee Swiss Roll is not just about looks; it’s a fun dessert that combines flavors in a way that makes each bite feel like a warm hug. Have a sweet craving? Why not give it a try? You’ll find that making a Swiss roll is easier than it sounds, and who wouldn’t want to impress their family with something that is both charming and delicious? So, put on your apron and let’s roll into this adventure!
Why You’ll Love This Coffee Swiss Roll
This Coffee Swiss Roll is the centerpiece of any dessert table, especially for family gatherings where everyone loves to indulge. With its delicate balance of texture and flavor, each slice offers an inviting combination of coffee-infused sponge cake and whipped cream.
Let’s talk about the cost-saving benefits of cooking at home. Homemade desserts can often save you a pretty penny compared to ordering from a bakery. Plus, you have control over the quality of the ingredients!
Don’t forget about the toppings! Whether you opt for the rich chocolate ganache or simply a dusting of cocoa powder, the flavor profiles can be adjusted to suit everyone’s tastes. If you enjoy this, you might also like my easy Vanilla Cream Puffs, which offer a similar delightful experience with their fluffy textures and creamy fillings. Why wait? Make this Coffee Swiss Roll today!
How to Make Coffee Swiss Roll
Quick Overview
The Coffee Swiss Roll is not just easy; it’s also deeply satisfying. With its soft, airy sponge cake and creamy filling, it’s hard to resist! You can expect to spend about 30 minutes prepping and 15 minutes baking, making it a perfect quick dessert for any occasion.
Ingredients for Coffee Swiss Roll
To make your Coffee Swiss Roll, gather the following ingredients:
- 4 eggs
- 100g sugar
- 100g all-purpose flour
- 2 tablespoons cocoa powder
- 1 teaspoon baking powder
- 1/4 cup brewed coffee
- 1 cup whipped cream
- Chocolate ganache (optional for filling)
Make sure all your ingredients are Halal-compliant.
Step-by-Step Instructions
- Preheat the Oven: Start by preheating your oven to 375°F (190°C). This ensures that your Swiss roll bakes evenly.
- Prepare the Cake Batter: In a large bowl, beat the eggs and sugar together until they turn light and fluffy. This process usually takes about 5-7 minutes.
- Mix Dry Ingredients: In another bowl, sift together the all-purpose flour, cocoa powder, and baking powder.
- Combine Mixtures: Gradually fold the dry ingredients into the egg mixture until fully incorporated. Pour in the brewed coffee and gently mix until smooth.
- Spread the Batter: Line a baking sheet with parchment paper. Spread the cake batter evenly onto the sheet, ensuring it reaches the corners.
- Bake: Bake for about 12-15 minutes or until the cake springs back when touched.
- Cool and Roll: Once baked, remove from the oven and immediately invert the cake onto another piece of parchment paper dusted with powdered sugar. Carefully peel off the top parchment layer and roll the cake tightly from one end to the other, letting it cool completely while rolled.
- Fill and Serve: Unroll the cooled cake, spread the whipped cream evenly, and roll it back up. If you like, drizzle some chocolate ganache on top before slicing into serving portions.
Top Tips for Perfecting Coffee Swiss Roll
- Substitutions: If you don’t have whipped cream on hand, you can blend Greek yogurt with a bit of sugar for a healthier twist!
- Timing: Be sure not to overbake the cake; it should remain soft and pliable.
- Common Mistakes: Avoid letting the cake cool too long before rolling; it may crack if it cools completely flat.
Storing and Reheating Tips
To keep your Coffee Swiss Roll fresh, store it in an airtight container in the refrigerator. It will stay good for about 3–5 days. If you’re planning to make it in advance, you can freeze the unfilled sponge roll for up to one month. Just remember to wrap it tightly in plastic wrap.
When you’re ready to enjoy it again, simply thaw it in the refrigerator overnight. For an even fresher taste, whip up some new whipped cream for the filling!
Enjoy creating and sharing this delightful Coffee Swiss Roll with your family and friends. It’s truly a treat that brings smiles and adds a touch of sweetness to every gathering!
Coffee Swiss Roll
Ingredients
Method
- Preheat the oven to 375°F (190°C).
- In a large bowl, beat the eggs and sugar together until light and fluffy, approximately 5-7 minutes.
- In another bowl, sift together the all-purpose flour, cocoa powder, and baking powder.
- Gradually fold the dry ingredients into the egg mixture until fully incorporated, then pour in the brewed coffee and mix gently until smooth.
- Line a baking sheet with parchment paper and spread the batter evenly onto the sheet.
- Bake for 12-15 minutes or until the cake springs back when touched.
- Remove from the oven and invert the cake onto a piece of parchment paper dusted with powdered sugar.
- Peel off the top parchment layer and roll the cake tightly from one end to the other, letting it cool completely while rolled.
- Unroll the cooled cake and spread the whipped cream evenly, then roll it back up.
- Drizzle some chocolate ganache on top before slicing into portions.
Notes

I am Mark Luke and I’m the founder of PrinterBio.com. I started this site because I was tired of dealing with the problems that come with using printers. I wanted to help others avoid the time and frustration I had, So I started this site based on my own experience & what I’ve learned from other professionals. My goal is to help you find the right printer and easily solve any problems you may have with your printer.