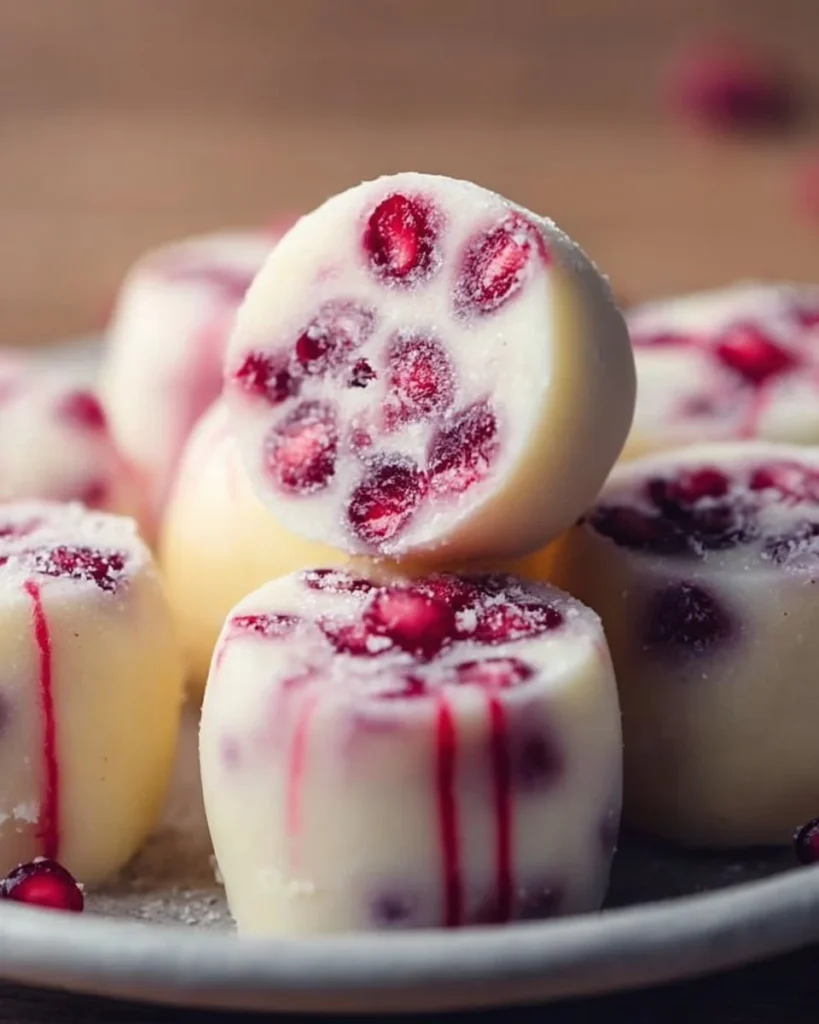
If you’re looking for a simple, delicious treat that everyone in the family can enjoy, look no further than these Homemade Frozen Yogurt Bites! Imagine the perfect combination of creamy yogurt and fresh fruit, all wrapped up in bite-sized pieces that are easy to share (or keep all to yourself!). Not only are these bites a delightful snack, but they also make for a fun activity with the little ones where they can choose their favorite toppings. Did you know that the first frozen yogurt was introduced in the 1970s? Fast forward to today, and it’s a beloved treat around the world! This recipe is a must-have, especially when compared to our other popular recipe for homemade fruit popsicles. Both are refreshing, but the creamy texture of these yogurt bites will have you reaching for more.
So, roll up your sleeves and get ready to whip up something special!
What Is Homemade Frozen Yogurt Bites?
You may find yourself wondering, “Why call them bites?” Well, their tiny size sure makes them irresistible, doesn’t it? You can pop one (or three) in your mouth without any fuss – they’re the perfect no-mess snack! Can we all agree that food served in smaller sizes just tastes better? Maybe it’s because the way to a man’s heart is through his stomach, but honestly, these popsicles are a crowd-pleaser no matter who you share them with. Want to try something new that’s also ridiculously easy to make? Grab your favorite yogurt and toppings, and let’s create delicious memories!
Why You’ll Love This Homemade Frozen Yogurt Bites
Decadent Yet Simple
One of the highlights of these Homemade Frozen Yogurt Bites is how incredibly easy they are to make. Unlike complicated desserts that require hours in the kitchen, these bites can be whipped up in minutes. Just mix, pour, freeze, and indulge! Contrast that to traditional ice cream, which can take a lot of time and ingredients to create. Here, you customize everything from yogurt to toppings, ensuring a fresh flavor with every batch.
Cost-Saving Benefits of Cooking at Home
Another reason to love these bites is the cost savings. Store-bought frozen treats can add up quickly, especially those healthy alternatives. Making your own means you can enjoy all the benefits without breaking the bank. Plus, you can use leftover fruit and yogurt that might otherwise go to waste!
Flavor Variety with Toppings
Let’s not forget about the toppings! Choose from a variety of fruits, nuts, and granola to create unique flavor combinations that suit your cravings. Whether it’s creamy blueberries, crunchy granola, or sweet maple syrup drizzled on top, each bite can offer a whole new experience. Don’t you just love how versatile these are?
Ready to dive into this delightful snack? Let’s make it happen!
How to Make Homemade Frozen Yogurt Bites
Quick Overview
Prepare for a delightful treat in just about 15 minutes (plus freezing time)! These Homemade Frozen Yogurt Bites feature a creamy and tangy texture contrasted perfectly with the sweet and crunchy toppings you choose. The kids will love helping out, and before you know it, you’ll have a delicious snack ready to go.
Ingredients
- 2 cups yogurt (plain or flavored)
- 1/4 cup honey or maple syrup (optional)
- 1/2 cup fruit (berries, diced bananas, etc.)
- 1/4 cup granola or nuts (optional)
Step-by-Step Instructions
- Prep Your Ingredients: Gather your ingredients on a clean workspace. If using fruit, wash and chop them into small pieces.
- Mix Everything Together: In a medium bowl, combine the yogurt and honey or maple syrup if using. Stir until fully incorporated. Ensure it’s well-mixed for an even sweetness!
- Add Your Toppings: Gently fold in your chosen fruits and nuts into the yogurt mixture. This will give you those delightful bursts of flavors when you bite into them.
- Pour Into Molds: Spoon the mixture into silicone molds or an ice cube tray. If you’re feeling creative, you can layer fruits at the bottom for a visually appealing treat!
- Freeze: Place the molds in the freezer and let them sit for at least 4 hours or until completely frozen.
- Enjoy: Once frozen, pop the bites out of the molds. Serve immediately or store in an airtight container in the freezer for later!
Top Tips for Perfecting Homemade Frozen Yogurt Bites
- Substitutions: If you want to enhance the flavors, try using flavored yogurt or using variations like coconut yogurt for a tropical twist. And don’t hesitate to swap honey for agave syrup if you prefer a plant-based sweetener.
- Timing: Keep an eye on the freezing time. Smaller molds will freeze faster than larger ones, so check them after about 2-3 hours.
- Avoid Common Mistakes: A common hiccup is making the mixture too watery. Ensure the toppings are not overly juicy. A good tip is to pat fruits dry before mixing to maintain the right consistency.
Storing and Reheating Tips
Once your Homemade Frozen Yogurt Bites are ready, store them in an airtight container in the freezer. They can last for up to 2 months, perfect for when you’re craving a cool snack. Keeping them stored in portion-sized containers can help control serving sizes—and make it easier to grab a quick treat! If they begin to stick together, just run warm water under the bottom of the container to separate.
While these yogurt bites are best enjoyed straight from the freezer, if they need a quick thaw, allow them a couple of minutes at room temperature for a perfect creamy bite!
Are you ready to treat your family to these delightful Homemade Frozen Yogurt Bites? You’ll be amazed at how something so simple can be so satisfying and rewarding. Dive into this easy recipe, and don’t forget to let your creativity shine with your choice of flavors and toppings!

FAQs
Can I use plant-based yogurt?
Absolutely! Coconut, almond, or cashew yogurt works beautifully!
How do I eat these bites?
Simply pop them out of the mold and enjoy as a quick snack!
Can I add other ingredients?
Yes! Get creative with chocolate chips, seeds, or a swirly of nut butter!
Now, it’s your turn! Gather your ingredients and get started on this fun family activity. Happy snacking!
Homemade Frozen Yogurt Bites
Ingredients
Method
- Gather your ingredients on a clean workspace. If using fruit, wash and chop them into small pieces.
- In a medium bowl, combine the yogurt and honey or maple syrup if using. Stir until fully incorporated.
- Gently fold in your chosen fruits and nuts into the yogurt mixture.
- Spoon the mixture into silicone molds or an ice cube tray. Optionally, layer fruits at the bottom for a visually appealing treat.
- Place the molds in the freezer and let them sit for at least 4 hours or until completely frozen.
- Once frozen, pop the bites out of the molds. Serve immediately or store in an airtight container in the freezer for later.
Notes

I am Mark Luke and I’m the founder of PrinterBio.com. I started this site because I was tired of dealing with the problems that come with using printers. I wanted to help others avoid the time and frustration I had, So I started this site based on my own experience & what I’ve learned from other professionals. My goal is to help you find the right printer and easily solve any problems you may have with your printer.