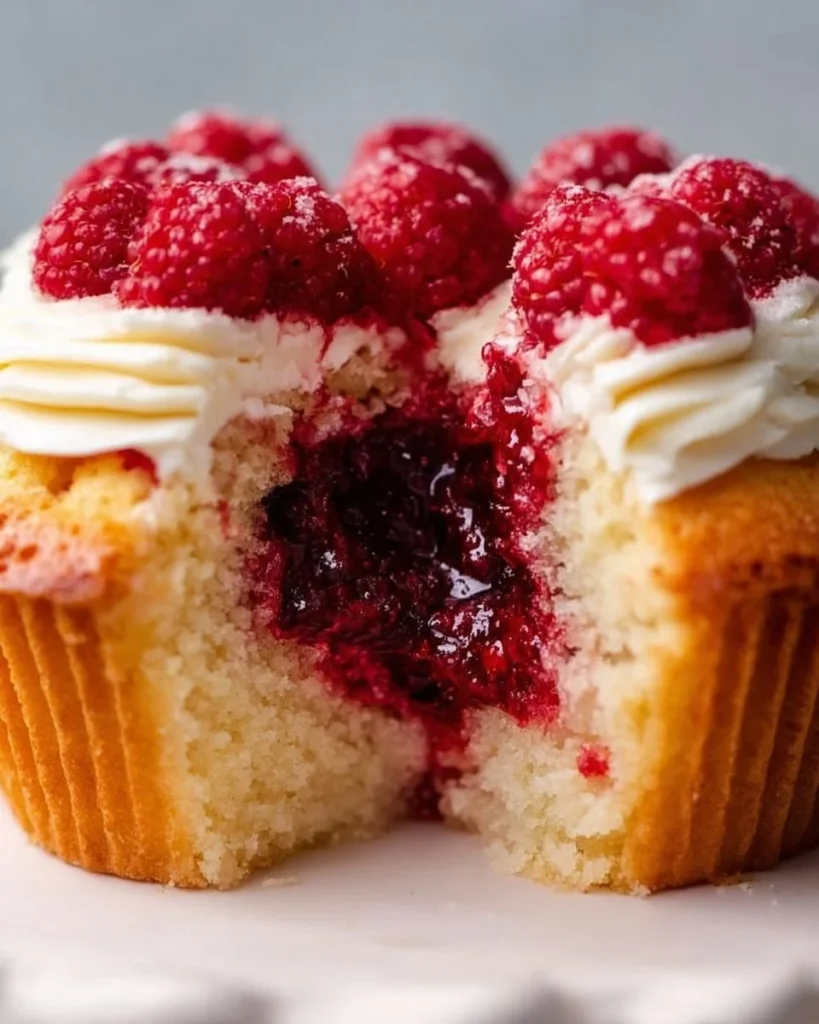
When it comes to cake fillings that make your taste buds sing, nothing quite compares to the vibrant and luscious flavor of Easy Raspberry Cake Filling. This sumptuous concoction combines the bright sweetness of ripe raspberries with just a hint of tang, creating a delightful textural contrast that pairs beautifully with any cake or pastry. Picture this: a fluffy, moist cake layered with a velvety raspberry filling that oozes with every bite. Whether it’s a family gathering or a quiet winter evening, this recipe has a way of bringing joy and satisfaction to your dessert table.
I remember the first time I tried a raspberry filling—it was at a family friend’s wedding. The cake was so good that I couldn’t stop thinking about it for days! Fast forward to today, and I’m thrilled to share my own take on this classic filling. It’s as effortless as our popular chocolate cream cheese filling but packs a unique berry punch that makes it feel extra special. Trust me, there’s simply no reason not to try it!

What is Easy Raspberry Cake Filling?
You might be wondering about the fun name “Easy Raspberry Cake Filling.” I mean, who came up with ‘easy’ anyway? Was it someone who wanted us to believe making cake fillings was like piecing together a jigsaw puzzle? Just like how they say “the way to a man’s heart is through his stomach,” I think the same applies to baking—especially when you’re filled with delicious raspberries! Speaking of which, did you know that raspberries are packed with vitamin C? Let’s dive into the fun of making this delightful filling! Make your cakes sing with joy and bring ready-to-serve smiles to your family gatherings!
Why You’ll Love This Easy Raspberry Cake Filling
This Easy Raspberry Cake Filling is the star of the show! It not only elevates your cake to gourmet status, but it can also save you money. Making this filling from scratch means you can control the ingredients and avoid those pricey bakery options. How does that sound? Plus, you can serve it with various flavor-enhancing toppings like whipped cream or chocolate shavings. It tantalizes the senses much like our beloved lemon curd filling, but its sweet-tart flavor profile makes it a delightful alternative. Trust me, your family will be raving about this filling long after dessert is served!
How to Make Easy Raspberry Cake Filling
Quick Overview
Making this Easy Raspberry Cake Filling is as satisfying as it is simple! You get to enjoy the sweet aroma of fresh raspberries while preparing a velvety filling that complements any dessert beautifully. In just about 30 minutes, you can whip up this scrumptious treat that’s ready to be layered in your favorite cakes or even enjoyed on its own! Let’s take a closer look at the ingredients you’ll need.
Ingredients
- 2 cups fresh raspberries
- 1/2 cup granulated sugar
- 2 tablespoons cornstarch
- 1 tablespoon lemon juice
- 1/2 cup water
This filling not only supports the flavors of your cakes, but it also boasts a beautiful color that is pleasing to the eye!
Step-by-Step Instructions
- Preparation of Ingredients: First, gather all your ingredients. Rinse the raspberries gently under cold water and let them drain.
- Combine Ingredients: In a medium saucepan, combine the rinsed raspberries, granulated sugar, lemon juice, and water. Stir them together gently to avoid crushing the berries.
- Cook the Mixture: Place the saucepan over medium heat and bring it to a gentle simmer. You want the raspberries to start breaking down, which should take about 5 minutes. Stir occasionally.
- Prepare the Cornstarch Slurry: In a small bowl, mix the cornstarch with a couple of tablespoons of cold water to create a slurry.
- Thicken the Filling: Once the raspberries have released their juices, add the cornstarch slurry to the mix. Keep stirring while bringing it back to a boil. Cook for another 1-2 minutes until the mixture thickens and becomes glossy.
- Cool the Filling: Remove from heat and allow it to cool to room temperature. You can store it in the refrigerator until you are ready to use it.
And just like that, you’ve created a scrumptious Easy Raspberry Cake Filling that dreams are made of!
Top Tips for Perfecting Easy Raspberry Cake Filling
- Substitutions: If you find yourself short on raspberries, you can easily substitute them with strawberries or blueberries for a similar yet distinct flavor.
- Timing: To achieve the best texture, don’t skip the cooling step. Allow the filling to cool properly before using it to avoid a soggy cake.
- Common Mistakes: Be careful not to overcook the filling, as it might become too thick. If you find it’s too thick, simply add a splash of water or lemon juice until you reach your desired consistency.
With these pro-tips in mind, you’ll be making flawless raspberry filling in no time!
Storing and Reheating Tips
If you find yourself with extra Easy Raspberry Cake Filling (although it’s hard to imagine that happening!), you can store it in an airtight container in the refrigerator for up to one week. You can also freeze it! Just let it cool completely, then transfer it to a freezer-safe container for up to three months. When you’re ready to use it, simply thaw it overnight in the refrigerator and give it a good stir before incorporating it into your cake.
Now that you’ve discovered the secrets of making a delightful Easy Raspberry Cake Filling, it’s time to get creative in the kitchen. Layer it in your favorite cakes, spread it between cookies, or simply enjoy it straight from the bowl! Happy baking!
Easy Raspberry Cake Filling
Ingredients
Method
- Gather all your ingredients and rinse the raspberries gently under cold water, then let them drain.
- In a medium saucepan, combine the rinsed raspberries, granulated sugar, lemon juice, and water. Stir gently to avoid crushing the berries.
- Place the saucepan over medium heat and bring to a gentle simmer. Cook for about 5 minutes, stirring occasionally, until the raspberries start breaking down.
- In a small bowl, mix the cornstarch with a couple of tablespoons of cold water to create a slurry.
- Add the cornstarch slurry to the raspberry mixture and keep stirring while bringing it back to a boil. Cook for another 1-2 minutes until the mixture thickens and becomes glossy.
- Remove from heat and allow it to cool to room temperature. Store in the refrigerator until ready to use.
Notes

I am Mark Luke and I’m the founder of PrinterBio.com. I started this site because I was tired of dealing with the problems that come with using printers. I wanted to help others avoid the time and frustration I had, So I started this site based on my own experience & what I’ve learned from other professionals. My goal is to help you find the right printer and easily solve any problems you may have with your printer.